Published · By Frank DeLozier, Owner & Master Fence Builder
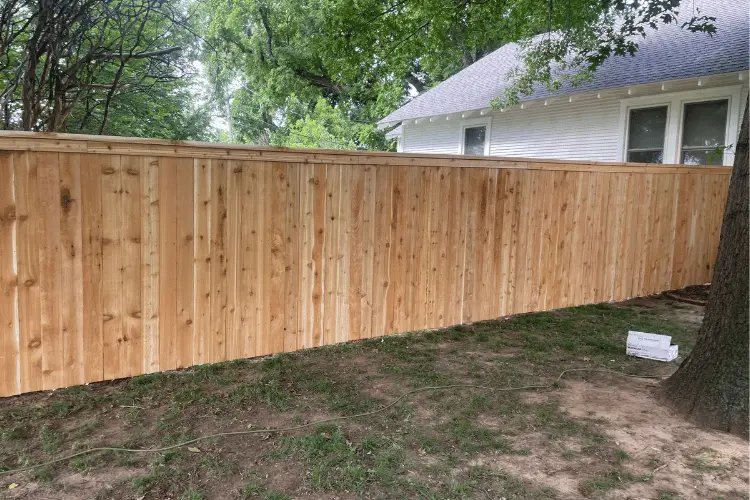
A cedar privacy fence built on site with posts set in concrete, the method covered in this guide.
To build a wood privacy fence, check your property lines and utilities, set corner and line posts in concrete, let them cure, attach horizontal rails, then fasten the pickets and hang the gate. It is doable for a skilled DIYer, but post setting, Oklahoma wind, and HOA rules are where most home builds go wrong.
How to Build a Wood Privacy Fence
Tools
- Post hole digger or power auger
- Level and post level
- String line and stakes
- Tape measure
- Circular saw
- Drill or ring-shank nail gun
- Wheelbarrow for mixing concrete
Materials
- Cedar pickets
- Pressure-treated or galvanized steel posts
- 2x4 cedar or treated rails
- Concrete mix and gravel
- Exterior screws or hot-dipped galvanized ring-shank nails
- Gate hardware (hinges and latch)
- 1
Check property lines, utilities, and rules
Confirm your exact property line, call 811 to locate underground utilities before you dig, and check city permit and HOA requirements for height, material, and which way the finished side must face. Getting this wrong is the most expensive mistake in fence building.
- 2
Lay out the fence line
Run a string line between stakes along the fence route and mark each post location, typically 6 to 8 feet apart on center. Square the corners with the 3-4-5 method and plan your gate openings before you dig.
- 3
Dig and set the posts in concrete
Dig each hole about a third of the post height deep; in Oklahoma we go deeper where wind and fence height call for it. Add a few inches of gravel for drainage, plumb each post with a level, and wet set it in concrete. Let the concrete fully cure before building on the posts.
- 4
Attach the horizontal rails
Once the posts have cured, fasten 2x4 rails between them, usually two rails on a 6-foot fence and three on an 8-foot fence, keeping each rail level and evenly spaced so the pickets hang straight.
- 5
Fasten the pickets
Attach cedar pickets to the rails with exterior screws or hot-dipped galvanized ring-shank nails, keeping each one plumb. For board-on-board, overlap the pickets so no gaps open as the cedar dries and shrinks.
- 6
Build and hang the gate
Frame a square, diagonally braced gate so it will not sag, hang it on heavy-duty hinges sized for its weight, and add a solid latch. Confirm it swings and latches cleanly before moving on.
- 7
Clean up and finish
Haul off scrap and old fencing, then let new cedar cure for several weeks before staining or sealing to protect it and hold its color, or leave it to weather to a natural gray.
Should You Build a Privacy Fence Yourself?
A privacy fence is one of the more achievable DIY projects for a handy homeowner with time and the right tools, especially on a small, flat, straight backyard run. If you can dig straight holes, work a level, and cut and fasten accurately, you can build a serviceable fence.
The honest caveats are time, tools, and the parts that are easy to underestimate: setting posts truly plumb and at the right depth, keeping long runs straight, building a gate that does not sag, and handling permits and HOA approval. Those are exactly where DIY fences most often go wrong, and where a pro build earns its keep.
What Makes an Oklahoma Privacy Fence Different
Building a privacy fence in Oklahoma is not the same as building one in a calm climate. A tall solid fence is a wind sail, and Oklahoma delivers the wind to test it, so the posts and their footings do the heavy lifting. That is why we place posts to the proper depth wet set in concrete (mixed on site with water and poured into post holes) and space them correctly rather than stretching them out to save on materials.
Soil matters too. Much of the metro sits on expansive clay that swells and shrinks with moisture, which can heave a poorly set post over time. Proper hole depth, a gravel base for drainage, and a full concrete set are what keep a fence plumb through Oklahoma’s wet springs, dry summers, and hard winds.
Choosing Cedar and the Right Materials
Western Red Cedar is the most popular privacy-fence wood in the metro because it naturally resists rot and insects and stays straighter than pine as it dries. Picket grade, rail size, and fastener quality all affect how long the fence lasts, and hot-dipped galvanized ring-shank nails or exterior screws resist rust and hold better than cheap fasteners.
Posts are the other key decision. Pressure-treated wood posts are the traditional, economical choice, but they rot at the ground line over time. Galvanized metal posts add wind resistance and do not rot at grade, which is why we set every wood fence we build on galvanized metal posts rather than wood.
Common Mistakes to Avoid
The most common privacy-fence mistakes are all avoidable. Setting posts too shallow or skipping concrete is the number-one cause of a fence that leans or blows down. Ignoring the property line or the HOA can mean tearing out finished work. Spacing posts too far apart leaves rails and pickets to sag over time.
Gates are the other frequent failure point: a gate framed without a diagonal brace will sag and drag within a season. Building the gate square and braced, and hanging it on hardware sized for its weight, prevents the single most annoying fence problem there is.
How Long Does It Take to Build a Privacy Fence?
A professional crew finishes most residential privacy fences in one to three days, depending on the size of the yard, the number of gates, the terrain, and the weather. That includes tearing out and hauling off an old fence when there is one.
A DIY build usually takes longer, often spread across weekends, and it must account for concrete cure time: you set the posts, then wait for the concrete to fully cure before hanging rails and pickets. Rushing that step is a common reason a DIY fence ends up out of plumb.
How Much Does Building a Privacy Fence Yourself Cost?
Building it yourself saves on labor, but it is rarely free, and it helps to count the full cost before deciding. You pay for materials, pickets, posts, rails, concrete, and fasteners, plus any tools you do not own. A power auger, a good level, and a nail gun are often rented, and rental adds up over a multi-weekend project, as does hauling off the old fence and the scrap.
The biggest hidden cost is your time and the risk of mistakes. A DIY fence that comes out leaning or with a sagging gate can cost more to fix than it saved, and a professional install comes with a warranty and no lost weekends. For a small, simple run the DIY math often works; for a large yard, a slope, or multiple gates, hiring out is frequently the better value once the true costs are counted.
Preparing Your Yard Before You Build
A little preparation makes the whole build go smoother. Before anything else, confirm your property line, ideally from your survey, so the fence goes where it belongs and not an inch onto a neighbor’s land. Call 811 to have underground utilities marked, since hitting a gas or electric line while digging post holes is dangerous and expensive.
Then clear the fence line: remove brush, trim back roots, and take out the old fence if there is one, pulling the old concrete-set posts. Note any slope, because the fence will need to be stepped or racked to follow the grade, and mark where gates will go. Handling these basics up front prevents the mid-project surprises, an unmarked sprinkler line, a boundary question, a buried stump, that stall a lot of DIY fences.
When to Hire a Pro Instead
It makes sense to hire out a privacy fence when the yard is large, the ground slopes or is rocky, there are multiple or wide gates, an HOA has strict requirements, or you simply want it done fast and backed by a warranty. A pro build also spares you renting equipment and disposing of the old fence.
That is our lane. Metro Fence builds cedar privacy fences custom on site across the OKC metro, with posts placed to the proper depth, wet set in concrete, HOA documentation handled, and a one-year workmanship warranty on every install. If you would rather skip the work, we are glad to give a free on-site estimate.
Good to Know
Frequently Asked Questions
It is achievable for a handy homeowner on a small, flat, straight run, but the hard parts are setting posts plumb at the right depth, keeping long runs straight, and building a gate that does not sag. Those, plus permits and HOA rules, are where most DIY fences struggle.
A good rule is about one-third of the post’s above-ground height. In Oklahoma we set privacy-fence posts to the proper depth, wet set in concrete, because wind, not frost, is the governing factor here, and deep, concrete-set posts are what keep the fence from leaning.
It depends on your city and neighborhood. Many OKC-metro cities and most HOAs have rules on fence height, material, setbacks, and which way the finished side faces. Always confirm local permit and HOA requirements before you build, since undoing an unapproved fence is costly.
A professional crew finishes most residential privacy fences in one to three days depending on size, gates, terrain, and weather. A DIY build usually takes longer and must allow time for the post concrete to fully cure before rails and pickets go on.
Keep Reading
Explore Our Fence Services