Published · By Frank DeLozier, Owner & Master Fence Builder
A braced, square-built gate hung on heavy hinges, the anti-sag details are covered step by step below.
To build a fence gate that stays square, frame a rectangle to fit the opening, add a diagonal brace running from the bottom of the hinge side up to the top of the latch side, attach the pickets, then hang it on heavy-duty hinges sized for its weight. That diagonal brace is what stops a gate from sagging.
How to Build a Wood Fence Gate
Tools
- Circular saw
- Drill or impact driver
- Framing square
- Level
- Clamps
- Tape measure
Materials
- 2x4 framing lumber
- Fence pickets
- Exterior screws
- Diagonal brace board (or anti-sag cable kit)
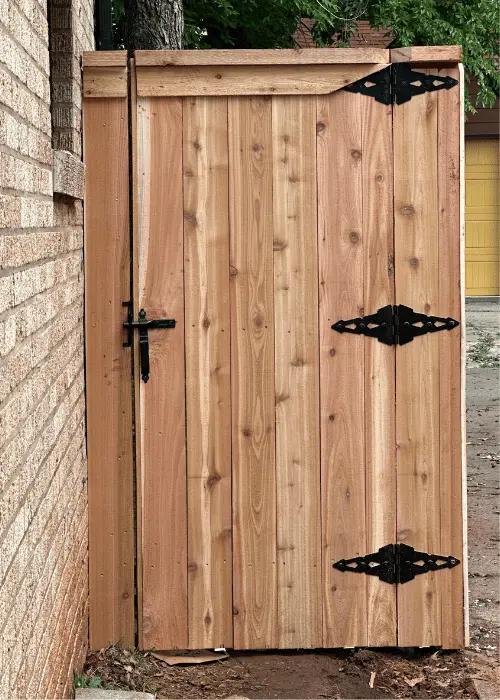
- Heavy-duty hinges
- Gate latch
- 1
Measure the opening
Measure between the gate posts and subtract for the hinge and latch gaps (about a half inch on the hinge side and a bit more on the latch side) so the finished gate swings freely.
- 2
Build the square frame
Cut and assemble a 2x4 rectangle to your gate size. Check it is truly square by measuring the two diagonals, which should be equal, and clamp it before fastening.
- 3
Add the diagonal brace
Run a diagonal brace from the bottom corner on the hinge side up to the top corner on the latch side. In this direction the brace works in compression and stops the gate from sagging.
- 4
Attach the pickets
Fasten the pickets to the frame with exterior screws, keeping them plumb and matched to the rest of the fence. The pickets also help stiffen the frame.
- 5
Hang the gate on hinges
Mount heavy-duty hinges sized for the gate’s weight, three hinges for a tall or heavy gate, to the hinge post, then hang the gate and shim it level while you fasten it.
- 6
Install the latch
Add a solid latch on the opposite post at a comfortable height, aligning it so it catches cleanly when the gate closes.
- 7
Check the swing and adjust
Open and close the gate to confirm it swings freely and latches without dragging. Adjust the hinges or shims as needed until it operates smoothly.
Why Fence Gates Sag (and How the Brace Fixes It)
A gate is a rectangle hanging off two hinges on one side, and gravity constantly tries to pull the far, latch-side corner downward, racking the rectangle into a parallelogram. That is sagging, and it is why a gate that closed fine last year now drags on the ground.
The cure is a diagonal brace that ties the corners together so the frame cannot rack. Done right, the brace turns a floppy rectangle into a rigid triangle, and triangles do not deform. It is the single most important part of building a gate that lasts.
Which Way Does the Diagonal Brace Go?
This is the detail people get backwards. On a wood gate, the diagonal brace should run from the bottom corner of the hinge side up to the top corner of the latch side. In that direction the brace is in compression, pushing up against the sagging corner, which is what wood does best.
Run it the other way and the brace is in tension, trying to hold the corner up by pulling, and a wood board and its screws are poor at that. A backwards brace is a common reason a carefully built gate still sags. Get the direction right and the gate stays square.
Cable and Turnbuckle Anti-Sag Kits
There is a second way to brace a gate: an anti-sag kit, a steel cable with a turnbuckle. Because a cable works in tension, it runs the opposite direction of a wood brace, from the top corner of the hinge side down to the bottom corner of the latch side, and you tighten the turnbuckle to pull the sagging corner back up.
Cable kits are handy for retrofitting a gate that has started to sag or for lighter gates. A solid wood compression brace is the more robust choice for a new, heavier gate, but either works when installed in the correct direction for how it carries the load.
Sizing Hinges and Hardware for Gate Weight
Hardware is where people under-build. A tall privacy gate is heavy, and light hinges will bend, pull out, or wear quickly under that load. Use heavy-duty exterior hinges rated for the gate’s weight, and use three hinges rather than two on a tall or heavy gate to spread the load.
Fasten hinges with long, strong screws or through-bolts into solid framing, not just into thin trim. Good hardware, properly mounted, is half of what keeps a gate swinging true for years; the brace is the other half.
Gate Posts: The Other Half of a Square Gate
A perfectly built gate will still sag if it hangs on a weak post. Gate posts carry a swinging load that constantly works to pull them out of plumb, so they must be set deeper and in more concrete than line posts, and braced while that concrete cures.
If a gate that was built square starts dragging, the post leaning is often the real culprit, not the gate itself. That is why we treat gate posts as a priority on every fence, setting them deep and solid so the gate they carry can stay square.
Wide and Double Gates
The wider the gate, the more it wants to sag, because the latch corner hangs farther from the hinges. Wide single gates need extra-stout framing, strong bracing, and heavy hardware, and at a certain width a double gate, two leaves meeting in the middle, is the better answer.
Double gates use a drop rod or cane bolt to pin one leaf to the ground so the other can latch against it. Driveway and equipment gates almost always go this route. They are more involved to build and hang correctly, which is often where a pro build pays off.
How Wide Should a Gate Be?
Gate width is a balance of access and sag. A standard walk gate is about 3 to 4 feet wide, enough for people and a mower. A single gate can be built wider, up to roughly 5 or 6 feet, but the wider it gets the harder it fights sag, so it needs stouter framing and heavier hardware.
Beyond that, a double gate is usually the better answer: two narrower leaves that meet in the middle span a wide opening without any single leaf hanging too far from its hinges. For driveways and equipment access, plan the width around what actually has to pass through, then build the gate, single or double, to suit it.
Choosing Gate Latches and Locks
The latch is the part you touch every day, so it is worth getting right. Common options include a simple gravity latch, a lever latch, and lockable latches for security. For a tall privacy gate, a latch operable from both sides is convenient, and many can be padlocked or keyed for a backyard or a pool gate.
Mount the latch on solid framing at a comfortable height and align it so the gate catches cleanly without slamming or missing, and add a gate stop so the gate cannot swing past the latch. Good latch hardware, properly aligned, is the difference between a gate that clicks shut easily and one everyone has to wrestle. For gates that face the street or secure a pool, we help you choose hardware that is both easy to use and appropriately secure.
When to Have a Gate Built by a Pro
A simple walk gate is a fair DIY project for a confident builder. Wide gates, double gates, and heavy custom gates are where it makes sense to bring in a pro who builds and hangs gates every day.
Metro Fence builds and hangs gates as part of every fence across the OKC metro, square, braced, and on hardware sized for the job, with posts and footings set to carry the weight of a wide leaf. A free on-site estimate is always available.
Good to Know
Frequently Asked Questions
Gravity pulls the latch-side corner down, racking the gate frame, unless a diagonal brace holds it square. A missing or backwards brace, undersized hinges, or a leaning gate post are the usual causes. A proper compression brace and solid hardware prevent it.
On a wood gate, run the diagonal brace from the bottom corner of the hinge side up to the top corner of the latch side, so it works in compression. A steel cable anti-sag kit runs the opposite way, in tension, and is tightened with a turnbuckle.
Build the frame square, add a correctly oriented diagonal brace, hang it on heavy-duty hinges sized for its weight, and set the gate post deep in concrete so it stays plumb. Those four things together keep a gate square and swinging freely for years.
Two heavy-duty hinges are the minimum, but a tall or heavy privacy gate should use three to spread the load and reduce sag. Whatever the count, mount them with long screws or through-bolts into solid framing, not thin trim.
Keep Reading
Explore Our Fence Services